神社 地域 にデジタルを
❝画像フィルタで写真加工❞のコーディング
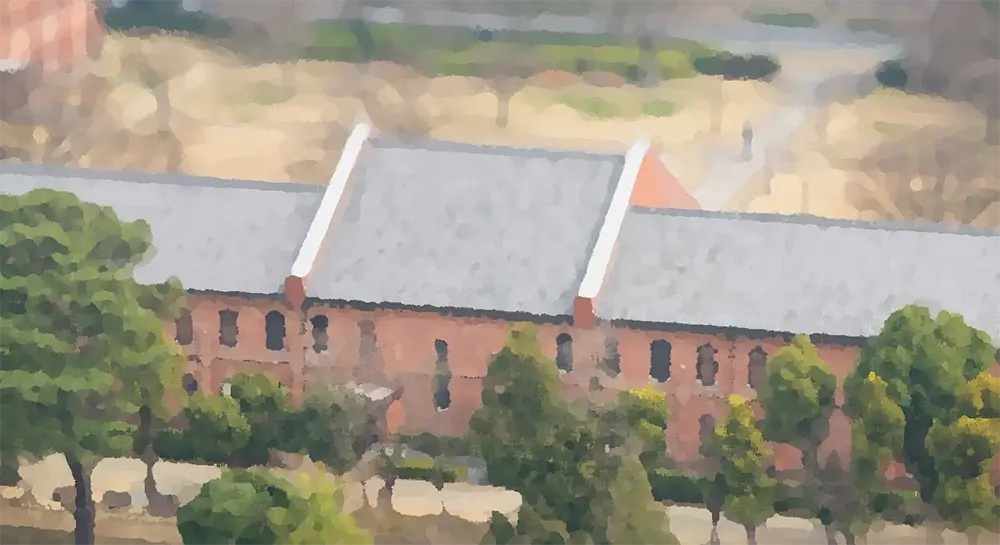
データベースにはWEBP形式で保存し、サイト上でのダウンロードにはPNG形式とするように設計。
保存領域を軽量なWEBPにし、ダウンロードするユーザー側は後の扱いがしやすいPNG形式としました。
画像のフィルタ加工は、CV2+numpyを利用。分からないことが多く、かなり苦戦しましたが、以下の概要でコーディングし、意図した動きとなりました。
概要を記します。
事前準備(概略)
<Poetryで仮想環境を準備(例)>事前にPoetryをインストールしておく
仮想環境をフォルダ直下にする
poetry config virtualenvs.in-project true
~$ mkdir o_poetry_dj
~$ cd o_poetry_dj/
~/o_poetry_dj$ poetry init
以下の設問にEnter、yes、noを入力
This command will guide you through creating your pyproject.toml config.
Package name [o_poetry_dj]:※Enterキー
Version [0.1.0]:※Enterキー
Description []:※Enterキー
Author [user , n to skip]:※Enterキー
License []:※Enterキー
Compatible Python versions [^3.10]:※Enterキー
Would you like to define your main dependencies interactively? (yes/no) [yes] no
Would you like to define your development dependencies interactively? (yes/no) [yes] no
Generated file
[tool.poetry]
name = "o_poetry_dj"
version = "0.1.0"
description = ""
authors = ["user "]
[tool.poetry.dependencies]
python = "^3.10"
[tool.poetry.dev-dependencies]
[build-system]
requires = ["poetry-core>=1.0.0"]
build-backend = "poetry.core.masonry.api"
Do you confirm generation? (yes/no) [yes] yes
poetry shell
<venvの場合(例)>※venvがインストールされていることを確認
python3 -m venv app_photos
source app_photos/bin/activate
以後、仮想環境で作業
必要なパッケージをインストール
<poetryの場合>
(仮想名) poetry add pillow opencv-python numpy 他
<pipの場合>
(仮想名) pip install opencv-python numpy 他
Djangoプロジェクトにアプリを作成
python manage.py startapp photos
スーパーユーザーを作成
python manage.py createsuperuser
settings.py(config/settings.py)
INSTALLED_APPS = [
    'django.contrib.admin',
    'django.contrib.auth',
    'django.contrib.contenttypes',
    'django.contrib.sessions',
    'django.contrib.messages',
    'django.contrib.staticfiles',

    "photos",
    ...省略...
TEMPLATES = [
    {
        'BACKEND': 'django.template.backends.django.DjangoTemplates',
        'DIRS': [BASE_DIR / "templates"],
        ...省略...

STATIC_URL = 'static/'
STATICFILES_DIRS = [BASE_DIR / "static"]

MEDIA_URL = 'media/'
MEDIA_ROOT = BASE_DIR / 'media'
プロジェクトフォルダのsettings.pyに記述
urls.py(config/urls.py)
from django.contrib import admin
from django.urls import path, include
from django.conf import settings
from django.conf.urls.static import static


urlpatterns = [
    path('admin/', admin.site.urls),
    path("photos/", include("photos.urls")),
    ...省略...

if settings.DEBUG:
    urlpatterns += static(settings.STATIC_URL, document_root=settings.STATIC_ROOT)
    urlpatterns += static(settings.MEDIA_URL, document_root=settings.MEDIA_ROOT)
プロジェクトフォルダのurls.pyに記述
フォルダ構成
utils_baseフォルダとutil.pyを作成しておきます
├── photos/
│   ├── admin.py
│   ├── apps.py
│   ├── forms.py
│   ├── __init__.py
│   ├── migrations/
│   ├── models.py
│   ├── __pycache__/
│   ├── tests.py
│   ├── urls.py
│   ├── utils_base/
│   ├── utils.py
│   └── views.py
utils_base内は以下のファイル構成
photos/utils_base/
├── cartoons.py
├── effects.py
├── miuture.py
cartoons.py, effects.pyを作ります
※minuture.pyは今回は使いません
utils_base/cartoons.py
import cv2
import numpy as np


def edges_mask(img, line_size, blur_value):
    gray = cv2.cvtColor(img, cv2.COLOR_BGR2GRAY)
    gray_blur = cv2.medianBlur(gray, blur_value)
    edges = cv2.adaptiveThreshold(gray_blur, 255, cv2.ADAPTIVE_THRESH_MEAN_C,
                                  cv2.THRESH_BINARY, line_size, blur_value)
    return edges

def color_quantization(img, k):
    # Transform the image
    data = np.float32(img).reshape((-1, 3))

    # Determine criteria
    criteria = (cv2.TERM_CRITERIA_EPS + cv2.TERM_CRITERIA_MAX_ITER, 20, 0.001)

    # K-Means
    ret, label, center = cv2.kmeans(data, k, None, criteria, 10, cv2.KMEANS_RANDOM_CENTERS)
    center = np.uint8(center)
    result = center[label.flatten()]
    result = result.reshape(img.shape)
    return result


def blur_to_cartoon(img):
    blurred = cv2.bilateralFilter(img, d=7, sigmaColor=200, sigmaSpace=200)
    cartoon = cv2.bitwise_and(blurred, blurred, mask=edges_mask)
    return cartoon
アニメ風の加工にするために、以下のサイトのコードを参考にさせていただきました
参照:
https://towardsdatascience.com/turn-photos-into-cartoons-using-python-bb1a9f578a7e
utils_base/effects.py
import cv2
import numpy as np


# HDR
def HD(image):
    hdrImage = cv2.detailEnhance(image, sigma_s=12, sigma_r=0.15)

    return hdrImage

# Pecil Sketch
def pencil(image):
    sk_gray, skColor = cv2.pencilSketch(image, sigma_s=60, sigma_r=0.07, shade_factor=0.1)
    return skColor

# Vintage 写真の周りを黒くする
def vignette(image, level=2):
    height, width = image.shape[:2]

    x_resultant_kernel = cv2.getGaussianKernel(width, width/level)
    y_resultant_kernel = cv2.getGaussianKernel(height, height/level)

    kernel = y_resultant_kernel * x_resultant_kernel.T
    mask = kernel / kernel.max()

    image_vignette = np.copy(image)

    for i in range(3):
        image_vignette[:, :, i] = image_vignette[:, :, i] * mask

    return image_vignette


# oil
def oil_paint(image):
    res = cv2.xphoto.oilPainting(image, 7, 1)
    return res

# watercolor
def watercolor(image):
    res = cv2.stylization(image, sigma_s=60, sigma_r=0.6)
    return res
他のフィルタは、以下のサイトを参考にさせていただきました。
参照:
https://dev.to/ethand91/creating-more-filters-with-opencv-and-python-3bhh
utils.py
以上の2つのファイルをutils.pyでimportしてまとめます。
import cv2
import numpy as np

from .utils_base.cartoons import edges_mask, color_quantization
from .utils_base.miuture import miniture_proc
from .utils_base.effects import oil_paint, pencil, HD, vignette, watercolor


# 画像加工処理
def get_filtered_image(image, action):
    img = cv2.cvtColor(image, cv2.COLOR_BGR2RGB)

    filtered = None
    if action == "NO_FILTER":
        filtered = image
    elif action == "ANIME": # anime, cartoon
        # filtered = cv2.cvtColor(img, cv2.COLOR_BGR2HSV)
        line_size = 7
        blur_value = 7
        edges = edges_mask(img, line_size, blur_value)

        total_color = 9
        img = color_quantization(img, total_color)

        blurred = cv2.bilateralFilter(img, d=7, sigmaColor=200,sigmaSpace=200)
        filtered = cv2.bitwise_and(blurred, blurred, mask=edges)
        filtered = cv2.cvtColor(filtered, cv2.COLOR_RGB2BGR)

    elif action == "OIL": # oil
        # filtered = cv2.cvtColor(img, cv2.COLOR_BGR2GRAY)
        filtered = oil_paint(img)
        filtered = cv2.cvtColor(filtered, cv2.COLOR_RGB2BGR)

    elif action == "PENCIL": # pencil
        filtered = pencil(img)
        filtered = cv2.cvtColor(filtered, cv2.COLOR_RGB2BGR)

    elif action == "WATER": # pencil
        filtered = watercolor(img)
        filtered = cv2.cvtColor(filtered, cv2.COLOR_RGB2BGR)


    elif action == "VINGNET": # vignette
        filtered = vignette(img)
        filtered = cv2.cvtColor(filtered, cv2.COLOR_RGB2BGR)

    elif action == "HDR": # HD
        filtered = HD(img)
        filtered = cv2.cvtColor(filtered, cv2.COLOR_RGB2BGR)

    return filtered
models.py
utils.pyの内容を取り込んで、DB保存時に加工結果を反映させます。
from django.db import models
from .utils import get_filtered_image
from PIL import Image
import numpy as np
from io import BytesIO
from django.core.files.base import ContentFile

import uuid

ACTION_CHOICES = (
    ("NO_FILTER", "Webp変換"),
    ("ANIME", "アニメ風"),
    ("OIL", "油絵風"),
    ("PENCIL", "鉛筆画風"),
    ("WATER", "水彩画風"),
    ("VINGNET", "ビネット"),
    ("HDR", "HDR"),
)


def image_folder(instance, filename):
    return 'photos/{}.webp'.format(uuid.uuid4().hex)


class Upload(models.Model):

    your_name = models.CharField(max_length=50, blank=True, null=True)
    image = models.ImageField(upload_to=image_folder)
    action = models.CharField(max_length=50, choices=ACTION_CHOICES, null=True)
    updated = models.DateTimeField(auto_now=True)
    created = models.DateTimeField(auto_now_add=True)

    def __str__(self):
        return str(self.pk)


    def save(self, *args, **kwargs):

        # open image
        pil_img = Image.open(self.image)

        # 画像の横幅が1500pxより大きい場合はリサイズ
        if pil_img.width > 1500:
            # scale_to_width(pil_img)
            print("Yes")
            height = round(pil_img.height * 1500 / pil_img.width)
            print(height)
            pil_img = pil_img.resize((1500, height))
            print("Resize Ok")

        # convert the image to array and do some processing
        cv_img = np.array(pil_img)
        img = get_filtered_image(cv_img, self.action)

        # convert back to pil image
        img_pil = Image.fromarray(img)

        # save

        buffer = BytesIO()
        buffer.seek(0)
        img_pil.save(buffer, format="webp")
        image_png = buffer.getvalue()

        self.image.save(str(self.image), ContentFile(image_png), save=False)

        super().save(*args, **kwargs)
models.pyには以下の要素をもたせます。
- ChoiceFieldを使えるように、項目をタプルにまとめる。11~19行目
- ファイル名にuuidを用いてセキュアにする。22行目
- アップロードされた画像が1500px以上の場合はリサイズ。44行目
- 拡張子をwebpにしてデータベースに保存。63行目
admin.py
管理画面で操作できるように、modelsの内容を登録します。
from django.contrib import admin
from .models import Upload
from django.utils.safestring import mark_safe
import os


class UploadPhotoAdmin(admin.ModelAdmin):
    list_display = ("id", "your_name", "image", "action", "custom_column", "photo_thumbnail")
    search_fields = ("action", "your_name")

    def custom_column(self, obj):
        # return '<img src="/media/' + str(obj.image) + '" download"' + str(obj.image) + '">' +\
        #     os.path.basename(str(obj.image)) + '</a>'
        return '<img src="/media/' + str(obj.image) + '" width="" style="">'


    custom_column.short_description = "Downloadリンク生成"

    def photo_thumbnail(self, obj):
        return mark_safe('<img src="{}" style="width:100px;height:auto">'.format(obj.image.url))

admin.site.register(Upload, UploadPhotoAdmin)
管理画面を便利に使うため、以下のことをしています。
- custom_columnでimgタグをhtmlコードで出力(コピー・アンド・ペーストで使えるように)12行目
- photo_thumbnailは、加工した後の画像が管理画面上に一覧表示される記述。20行目
forms.py
シンプルなモデルフォームを用意します。
from django import forms
from .models import Upload


class UploadForm(forms.ModelForm):
    class Meta:
        model = Upload
        fields = ("image", )
urls.py
from django.urls import path
from .views import photo_add_view

app_name = "photos"

urlpatterns = [
    # path("", HomeView.as_view(), name="home"),
    path("", photo_add_view, name="photo_process"),

]
views.py
from django.shortcuts import render, get_object_or_404
from django.views.generic import TemplateView
from django.http import HttpResponse

from .forms import UploadForm
from .models import Upload
from django.http import JsonResponse
import json
from django.core import serializers

from PIL import Image


# class HomeView(TemplateView):
#     template_name = "index.html"


def is_ajax(request):
    return request.META.get('HTTP_X_REQUESTED_WITH') == 'XMLHttpRequest'


def photo_add_view(request):
    form = UploadForm(request.POST or None, request.FILES or None)

    if is_ajax(request):
        pic_id = json.loads(request.POST.get('id'))
        action = request.POST.get("action")

        if pic_id is None:
            if form.is_valid():
                obj = form.save(commit=False)

        else:
            obj = Upload.objects.get(id=pic_id)

        obj.action = action
        if request.user.is_superuser and request.user.last_name == "名前など":
            obj.your_name = "your_name"
        obj.save()
        data = serializers.serialize("json", [obj])
        return JsonResponse({"data": data})

    context = {
        "form": form,
    }
    return render(request, "photos/main.html", context)
AJAXを使うための記述を追記しています。19行目 ※Django4.0以降はこの記述が必要
templates/base.html
※雛形のイメージhtmlです 用途に合わせて手直してください
{% load static %}
<!doctype html>
<html lanh=ja>
    <head>
        <!-- Require meta tags -->
        <meta charset="UTF-8">
        <meta name="viewport" content="width=device-width, initial-scale=1.0", shrink-to-fit=none>

        <!-- Bootstrap CSS -->
        <link rel="stylesheet" href="https://cdn.jsdelivr.net/npm/bootstrap@5.0.2/dist/css/bootstrap.min.css" rel="stylesheet" integrity="sha384-EVSTQN3/azprG1Anm3QDgpJLIm9Nao0Yz1ztcQTwFspd3yD65VohhpuuCOmLASjC" crossorigin="anonymous">

        <!-- custom css & js -->
        <link rel="stylesheet" href="{% static 'style.css' %}">
        <script src="{% static 'main.js' %}" defer></script>


        <title>Spiner | {% block title %}{% endblock title %}</title>
    </head>
    <body>
        <div class="container mt-3">
            {% block content %}
            {% endblock content %}
        </div>
        <!-- Optional Javascript -->
        <!-- jQuery first, then Popper.js, then Bootstrap JS-->
        <script
        src="https://code.jquery.com/jquery-3.6.3.min.js"
        integrity="sha256-pvPw+upLPUjgMXY0G+8O0xUf+/Im1MZjXxxgOcBQBXU="
        crossorigin="anonymous"></script>
        <script src="https://cdn.jsdelivr.net/npm/@popperjs/core@2.9.2/dist/umd/popper.min.js" integrity="sha384-IQsoLXl5PILFhosVNubq5LC7Qb9DXgDA9i+tQ8Zj3iwWAwPtgFTxbJ8NT4GN1R8p" crossorigin="anonymous"></script>
        <script src="https://cdn.jsdelivr.net/npm/bootstrap@5.0.2/dist/js/bootstrap.min.js" integrity="sha384-cVKIPhGWiC2Al4u+LWgxfKTRIcfu0JTxR+EQDz/bgldoEyl4H0zUF0QKbrJ0EcQF" crossorigin="anonymous"></script>
    </body>
</html>
templates/photos/main.html
base.htmlを継承し、サイト上に表示させるためのhtmlを作成します。
{% extends 'base.html' %}
{% load static %}
{% load widget_tweaks %}

{% block title %}画像のフィルタ{% endblock title %}

{% block head_scripts %}
    <script src="{% static 'js/photos_process.js' %}" defer></script>
{% endblock head_scripts %}


{% block contents %}
<div class="row">

    <div class="col">
        <h3 class="mb-4">画像フィルタで写真加工</h3>

        <div id="alert-box"></div>
        <div id="img-box" class="text-center"></div>


        <form action="" id="p-form" autocomplete="off">
            {% csrf_token %}

            {% for field in form %}
                <div class="form-group">
                    <label class="upload-label">
                    {% render_field field name="file" class="js-upload-file" %}画像ファイルを選択
                    </label>
                    {% if field.help_text %}
                        <small class="form-text text-muted">
                            {{ field.help_text }}
                        </small>
                    {% endif %}
                    <div class="js-upload-filename mb-3">ファイルが未選択です</div>
                </div>
            {% endfor %}

            <div id="btn-box" class="not-visible mt-1 mb-3">
                {% if user.is_superuser %}
                <button type="submit" class="btn btn-primary mt-1" data-filter="NO_FILTER">Webpに変換</button>
                {% endif %}
                <button type="submit" class="btn btn-primary mt-1" data-filter="ANIME">アニメ風</button>
                <button type="submit" class="btn btn-primary mt-1" data-filter="OIL">油絵風</button>
                <button type="submit" class="btn btn-primary mt-1" data-filter="PENCIL">鉛筆画風</button>
                <button type="submit" class="btn btn-primary mt-1" data-filter="WATER">水彩画風</button>
                <button type="submit" class="btn btn-primary mt-1" data-filter="VINGNET">ビネット</button>
                <button type="submit" class="btn btn-primary mt-1" data-filter="HDR">HDR</button>
                <button class="btn btn-danger mt-1" onclick="window.location.reload();">最初からはじめる</button>

            </div>
            <p id="png_dwn" class="text-center mt-5 not-visible"><a href="" id="download-link">出来上がった画像をPNGファイルでダウンロード</a></p>
        </form>

        <ol>
            <li>画像を選択してアップロード</li>
            <li>エフェクトをボタンを押す</li>
            <li>ダウンロード</li>
        </ol>

    </div>
</div>
<hr>


{% comment %} <button type="submit"></button> {% endcomment %}
{% endblock contents %}

{% block end_scripts %}
<script>
    $(function() {
      $('.js-upload-file').on('change', function () { //ファイルが選択されたら
        var file = $(this).prop('files')[0]; //ファイルの情報を代入(file.name=ファイル名/file.size=ファイルサイズ/file.type=ファイルタイプ)
        $('.js-upload-filename').text(file.name); //ファイル名を出力
      });
    });
    </script>
{% endblock end_scripts %}
Javascriptで制御させるため、以下のことを行っています。
- メッセージを表示する領域を設ける。19行目
- 画像を表示させる領域を設ける。20行目
- 画像が表示されたら加工用のボタンを表示。40~50行目
- 既存のFileInputをカスタマイズ。69~76行目
既存のFileInputのカスタマイズには、以下のサイトを参考にさせていただきました
参照:
https://techmemo.biz/css/input-file-name-clear/
static/js/photos_process.js
const alertBox = document.getElementById("alert-box")
const imgBox = document.getElementById("img-box")
const form = document.getElementById("p-form")
const image = document.getElementById("id_image")

const btnBox = document.getElementById("btn-box")
console.log(btnBox.children)
const btns = [...btnBox.children]

// const mediaUrl = window.location.pathname  + "media/"
// const mediaUrl = document.domain  + "/media/"
const mediaUrl = window.location.origin + "/media/"
console.log(mediaUrl)

const csrf = document.getElementsByName("csrfmiddlewaretoken")

const PngDwn = document.getElementById("png_dwn")

const url = ""
const handleAlert = (type, text) => {
    alertBox.innerHTML = `<div class="alert alert-${type}" role="alert">
                            ${text}
                        </div>`
}

image.addEventListener("change", ()=>{
    const img_data = image.files[0]
    const url = URL.createObjectURL(img_data)
    console.log(url)
    imgBox.innerHTML = `<img src="${url}" style="max-width: 100%;height: auto;" alt="">`
    btnBox.classList.remove("not-visible")
})

let filter = null
btns.forEach(btn => btn.addEventListener('click', () => {
    filter = btn.getAttribute("data-filter")
    console.log(filter)
    PngDwn.classList.remove("not-visible")
}))

let id = null
form.addEventListener("submit", e=>{
    e.preventDefault()
    const fd = new FormData()
    fd.append('csrfmiddlewaretoken', csrf[0].value)
    fd.append("image", image.files[0])
    fd.append("action", filter)
    fd.append("id", id)


    $.ajax({
        type: "POST",
        url: url,
        enctype: "multipart/form-data",
        data: fd,
        success: function(response) {
            const data = JSON.parse(response.data)
            console.log(data)
            id = data[0].pk
            imgBox.innerHTML = `
                    <img src="${mediaUrl + data[0].fields.image}" style="max-width: 100%;height: auto;" alt="">
                    `
            const sText = `変換完了しました action: ${data[0].fields.action}`

            // PNGでダウンロードさせる記述
            function toDataURL(src, callback){
                var image = new Image();
                image.crossOrigin = 'Anonymous';

                image.onload = function(){
                  var canvas = document.createElement('canvas');
                  var context = canvas.getContext('2d');
                  canvas.height = this.naturalHeight;
                  canvas.width = this.naturalWidth;
                  context.drawImage(this, 0, 0);
                  var dataURL = canvas.toDataURL('image/png');
                  callback(dataURL);
                };
                image.src = src;
              }
                  toDataURL(`${mediaUrl + data[0].fields.image}`, function(dataURL){
                    // alert(dataURL);
                    document.getElementById("download-link").addEventListener("click", ()=>{
                        const base64 = dataURL
                        let a = document.createElement('a');
                        a.href = base64;
                        a.download = "process.png";
                        a.click();
                    })
                })


            handleAlert("success", sText)
            setTimeout(()=>{
                alertBox.innerHTML = ""
            }, 3000)
        },
        error: function(error) {
            console.log(error)
            handleAlert("danger", "設定が間違っているようです")
        },
        caches: false,
        contentType: false,
        processData: false,
    })
})
views.pyと連携 JavaScriptでDB保存。
png形式でのダウンロードリンクを生成します。
投稿内容 ランダム表示
❝地図とグラフで見る大阪府データ❞のコーディング
最終更新:2023年09月06日

HTMLメールを活用してみた
最終更新:2023年07月14日
❝地図とグラフで見る大阪府データ❞の使い方
最終更新:2023年07月14日

❝ワードクラウド ジェネレーター❞の使い方
最終更新:2023年07月14日
python3.10 Django4 wsl bootstrap javascript
カテゴリ
私の願い
私は神社の宮司です。神社や地域を担う次世代の人々に対し、何かを残してお役に立ててもらいたいとの願いが、強く芽生えました。個業としての神社や、小規模な地域社会に、恩恵が届くのが遅くなりそうな「デジタル」の分野。門外漢として奮闘した実体験から得た経験則を、わずかずつでも残し未来につなぎたいと願うばかりです。
最近の投稿
- 簡易で安価なカメラで防犯・外出対策を
最終更新:2023年09月08日
- 神社のオリジナルTシャツを作ってみた
最終更新:2023年08月07日
- HTMLメールを活用してみた
最終更新:2023年07月14日
- 豊中市Graphの基データの説明
最終更新:2023年07月14日
